
I’m a big fan of the Pedaltrain Classic Jr for being lightweight and having a reasonable stage footprint but the lack of mounting options for a power supply is really disappointing. This board can easily hold 10 pedals so it’s not unreasonable to want to use an isolated power supply rather than just daisy chaining the pedals. Here’s the materials I used to mount an MXR ISO-Brick -and what I’d do differently- if I were to do it again.
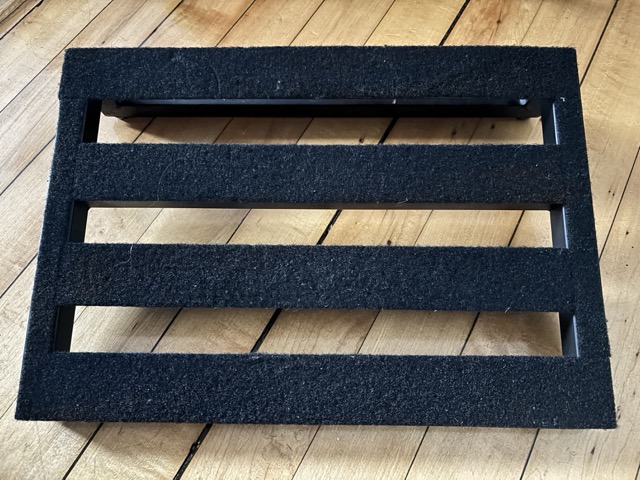
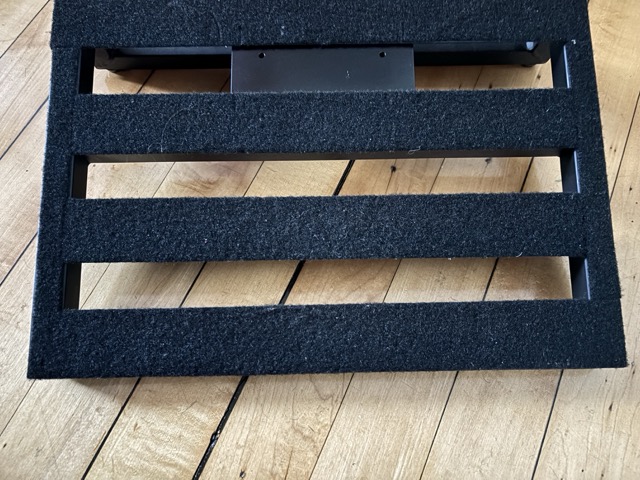
Here’s our starting point. Velcro already on the board so I made a few cuts where the mounting screws will go.

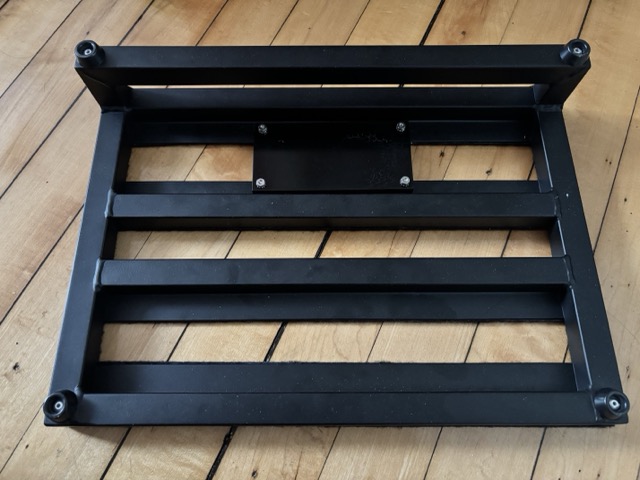
We’ll be using a piece of aluminum flat bar as a mounting bracket, so holes on the pedalboard are spaced to fit the flat bar. Here I used four #6 countersunk screws, 3/4″ in length because I had them around but any small screw will work here.
Mounting bracket was purchased from eBay- it’s a 1/2″ thick piece of aluminum flat bar that’s 3″ wide and 6″ long. Aluminum flat bar comes unfinished so plan on time to paint after drilling if you care about that. I needed about 3/8″ of clearance so the power cables will have clearance over the support bars so I went with a 1/2″ to be safe. I’d recommend getting a 0.125″ or .250″ plate and using spacers to get the correct clearance since this bracket is unnecessarily heavy. It’s attached using locking nuts.
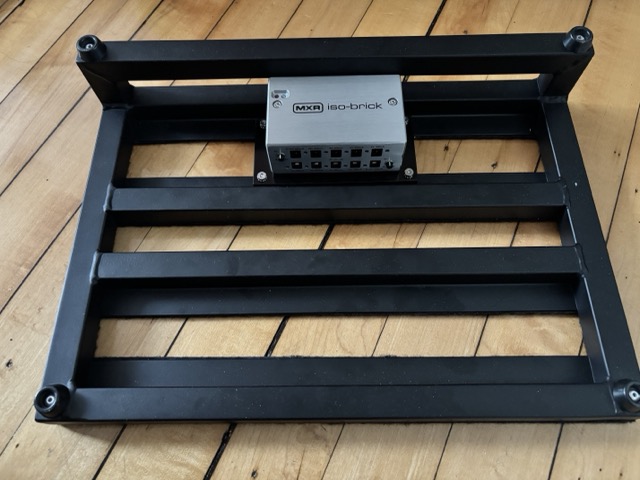
Here’s a test fit of the ISO-Brick.

And here is a picture showing the cable clearance when using a 1/2″ thick mounting bracket.
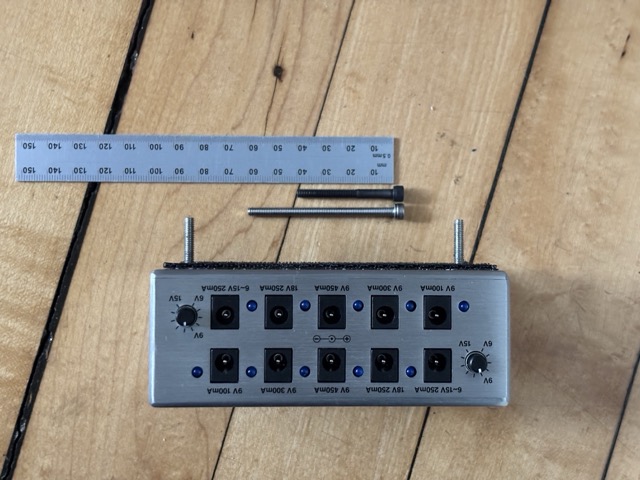
The ISO-Brick has two screws keeping the enclosure together. What’s really nice is these screws go straight through the chassis and if I replace them with longer screws I can use them as a mounting point for the power supply to the bracket. The stock screws are hex (allen) socket M4-0.7 x 40mm. I replaced them with stainless M4-0.7 x 60mm which gives the result above.
View from above of where it’s at so far. Bracket is attached, holes are drilled for the power supply mounting screws, and it’s ready to finish this up.
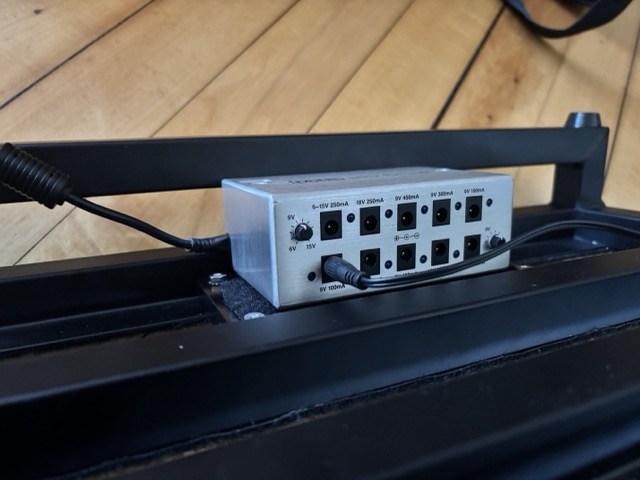
The power supply fits, there’s enough clearance for the cables, the power supply isn’t so tall that it touches the ground when the pedal is flipped over.
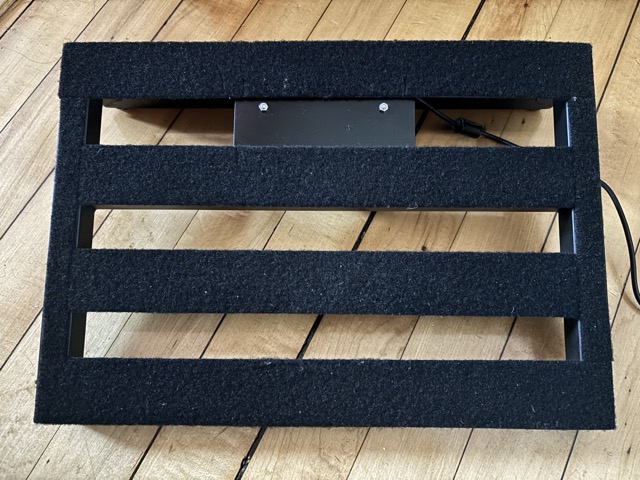
Two M4 nuts to hold the power supply to the bracket.
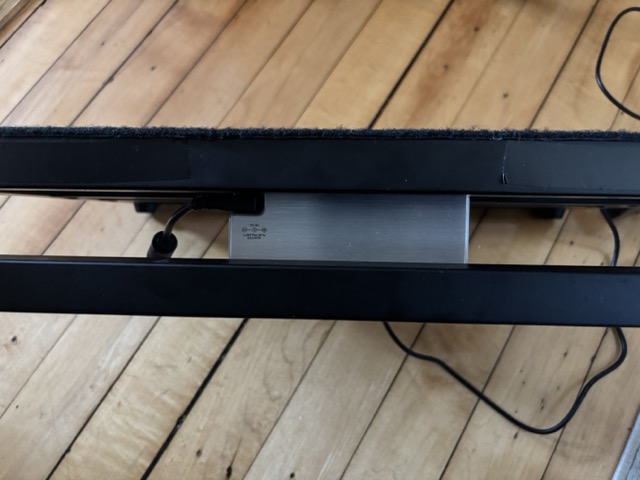
And a view from the back of the pedalboard showing that there’s enough clearance to allow the power cable to be unplugged if needed.
So this is everything- 6 screws and a lot of measuring to make sure the clearances all would work. The big takeaway would be to get a 0.125″ or 0.250″ at the most for the aluminum plate thickness and use washers or spacers to give the clearance needed to reach about 1/2″. Without that clearance you won’t be able to plug power cables into the power outlets of the ISO-Brick. If using a thinner plate you’ll also want to get shorter M4-0.7 x 60mm screws for the power supply itself, likely 55mm depending on the thickness of your plate.